
The following are the steps to set Managed DNS for Blogger Custom Domain :
- Go to your blog account and click on Basics under the Settings tab. In the Publishing section, click the link to Add a custom domain (sometimes this link is shown as Setup a 3rd party URL for your blog).

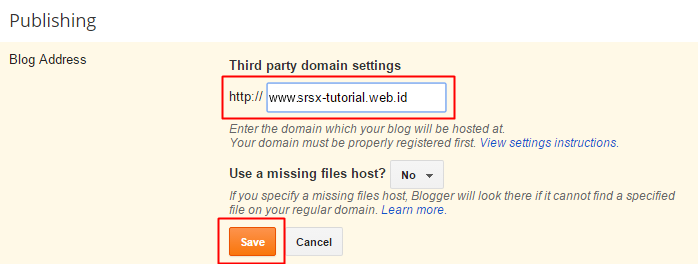
- Type the URL of the domain you’ve purchased, keeping in mind that it must begin with www in order to work. After that, click Save button.
- You should see an error message, and two CNAMEs listed below. Each CNAME is composed of two parts – ‘Name, Label or Host field’ and ‘Destination, Target or Points To field’. The first CNAME is the same for everyone, Name being “www” and Destination “ghs.google.com.” The second CNAME is particular to your blog and your Google Account, and is therefore different for each person. This CNAME will used in SRS-X Managed DNS settings.

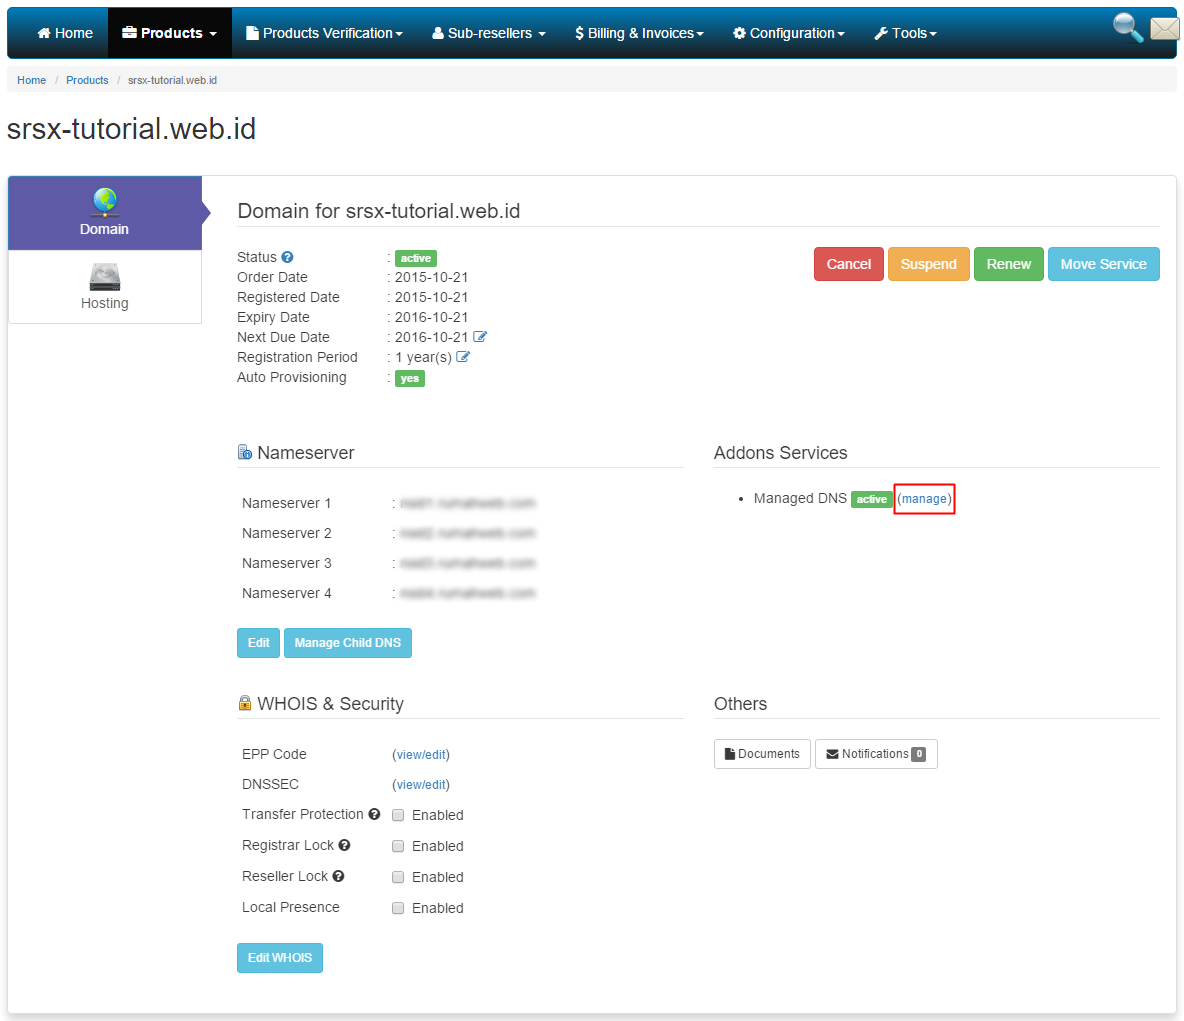
- Leave this Blogger Setting panel for a while. Then open your SRS-X panel and go to Domain Details page. Click Managed DNS (manage) menu.
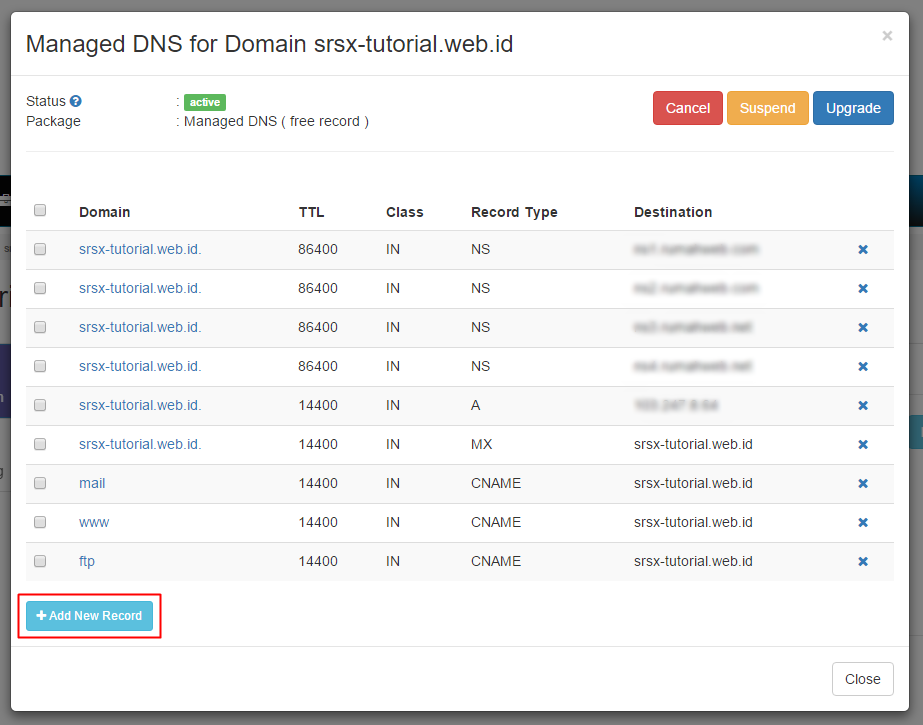
- Add new record by clicking Add New Record button.
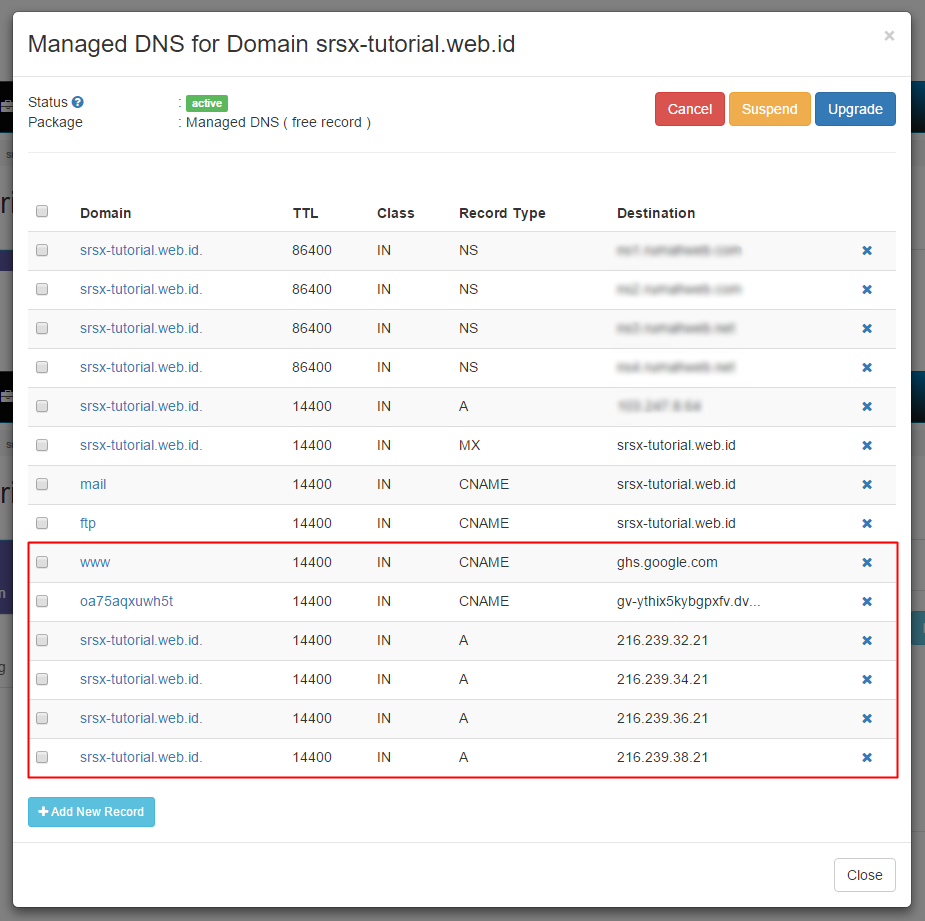
- Add two CNAME Records that listed in Blogger Settings panel to SRS-X panel by input values at Domain, Record Type, and Hostname input box. Click Save button.
 and
and 
- And then, add some A Records by input values at Domain, Record Type, and IP or Hostname input box. You can get the IP or Hostname value by opening Blogger Settings Instruction page. After that, click Save button.

- If you have completing Managed DNS Settings in SRS-X panel, you can see that you have add six new records from Blogger.
- And then go back to Blogger Settings panel, try to save this settings by clicking Save button. If you can’t save this settings, please be patient, as it might take up to 24 hours for the redirect to start working. If you’re still seeing an error after 24 hours, it means your settings weren’t entered correctly and you should try the process a second time.
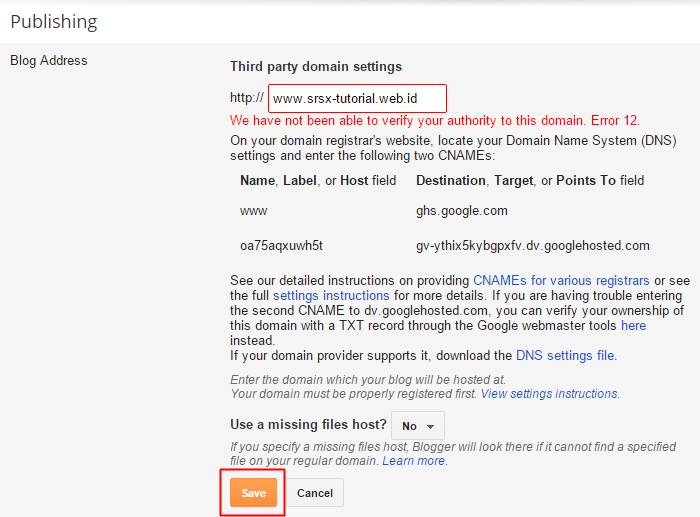
- If your settings was saved successfully, then you will see your settings in your Blogger Settings panel like image below.

Note:
When Blogger can’t verify your domain by their CNAMEs, try to add TXT Record. The following are the steps to adding TXT Record to SRS-X:
- Click here link in Blogger Settings panel.

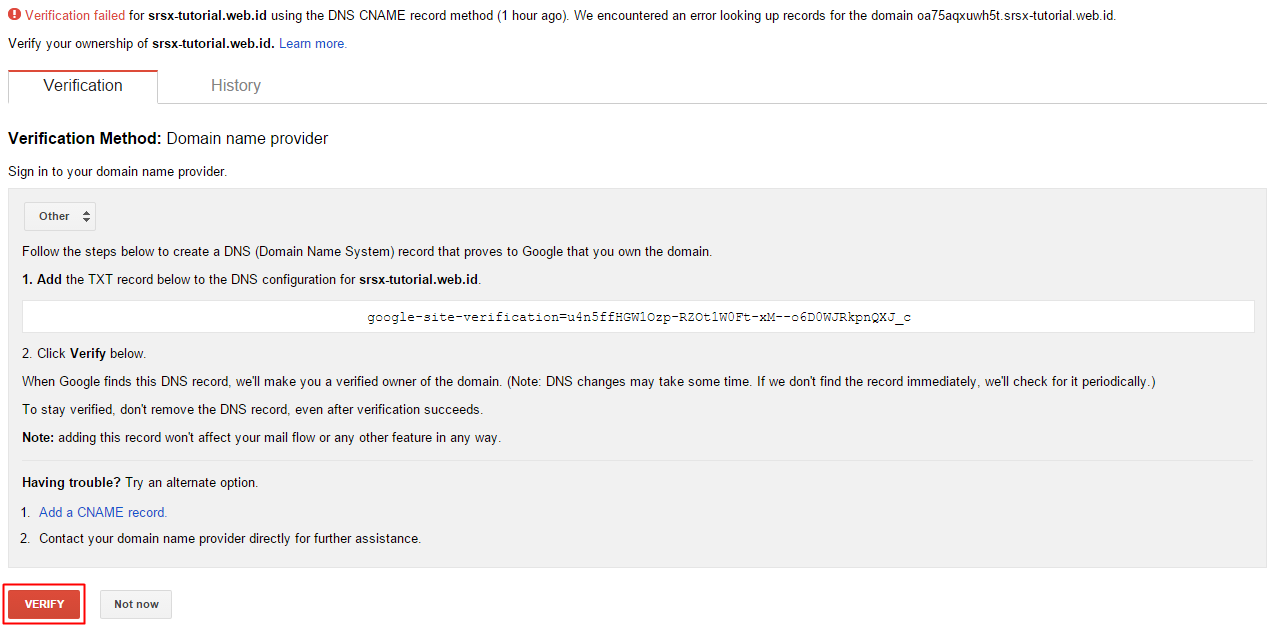
- You will be redirected to Google Webmaster Verification page. Choose your domain provider, if your domain provider is not listed, then choose Other. Copy TXT Record that shown in that page.

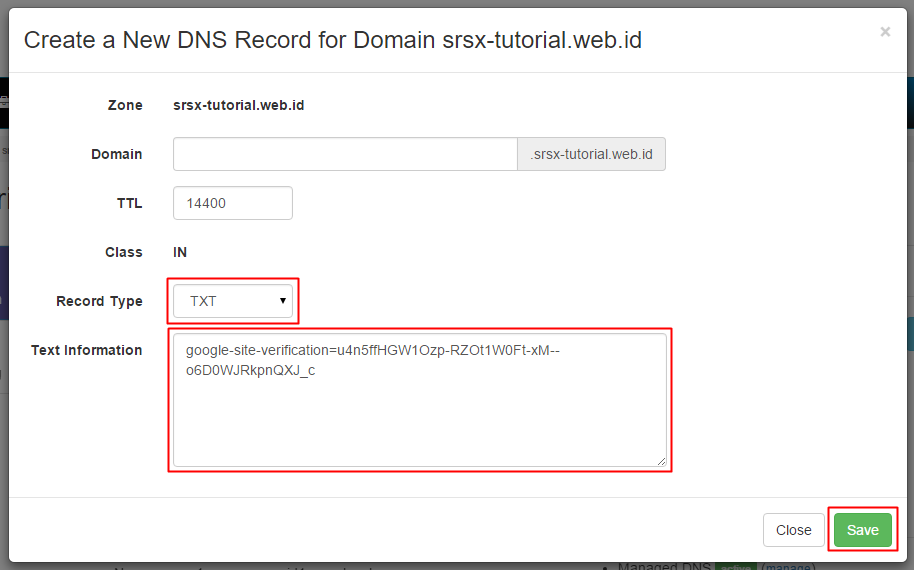
- Back to SRS-X panel. Add New Record and input Record Type and Text Information. And then click Save button.
- Back again to Google Webmaster Verification page, click VERIFY button.
- Finish.